Image colour effects recipes in Pillow
Categories: pillow

These ImageOps functions provide various colour effects.
colorize
colorise adds colour to greyscale images.
In its simplest form, it works by specifying two colours. Black pixels are set to the first colour, white pixels are set to the second colour, and grey pixels are set to an intermediate colour (depending on the grey value). Here is an example:
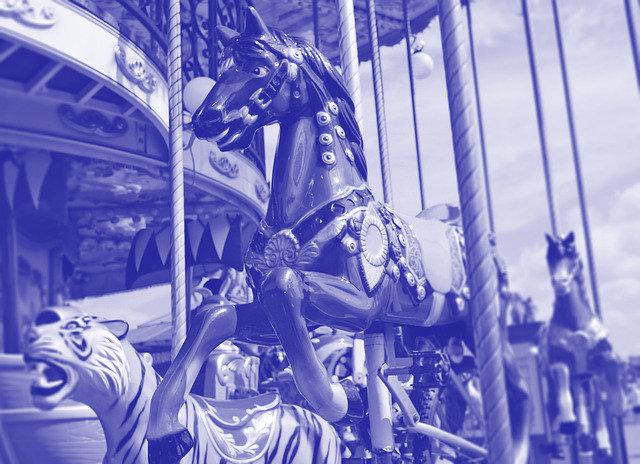
In this case, we have used dark blue for the first colour and white for the second colour. This is like a blue-tinged version of a black and white image. Here is the code:
im = Image.open('carousel-grey.jpg')
im = ImageOps.colorize(im, 'darkblue', 'white')
im.save('imageops-colorize-1.jpg')
In the next example, the colours are dark blue and yellow. The code is the same as above, but with the second colour changed. The intermediate greys are replaced by different shades of green:
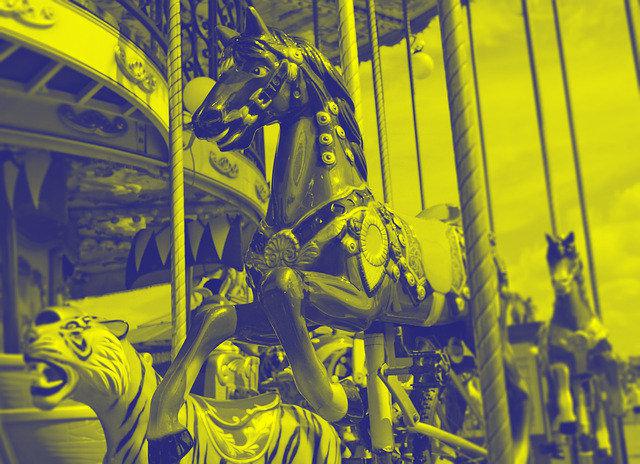
In this case we have used a fairly dark colour to replace black, and a fairly light colour to replace white, so the image still looks quite realistic.
It is also possible to specify a third, mid-tone colour. Grey values between 0 and 127 with vary between the black colour and the mid colour. Grey values between 127 and 255 with vary between the mid colour and the white colour. In this case we have used purple to blue to white, which gives a quite subtle effect, but you could use clashing colours to create a more dramatic effect:

Here is the code to use 3 colours:
im = Image.open('carousel-grey.jpg')
im = ImageOps.colorize(im, 'purple', 'white', mid='mediumslateblue')
im.save('imageops-colorize-3.jpg')
By default, the black colour applies at grey level 0 (the blackpoint), and the white colour applies at grey level 255 (the whitepoint). We can change this. In the image below we set the blackpoint to 64, which means any grey level of 64 or less will be set to the black colour. We also set the whitepoint to 192, which means that any grey level of 192 or greater will be set to the white colour. Grey values between 64 and 192 will vary smoothly from the black colour to the white colour.
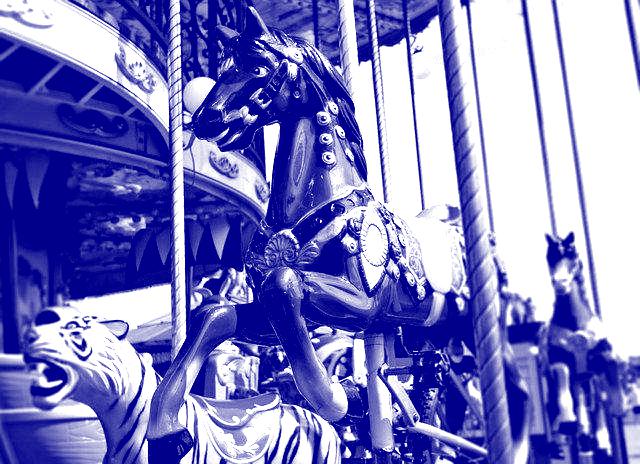
The effect of this is to increase the contrast of the final image. It is mainly intended to correct for a low contrast input image. For example if you know that the input image only had grey values between 64 and 192, you could use this feature to correct for it.
Here is the code:
im = Image.open('carousel-grey.jpg')
im = ImageOps.colorize(im, 'darkblue', 'white', blackpoint=64, whitepoint=192)
im.save('imageops-colorize-bp.jpg')
There is also a midpoint that can be used to specify where the mid colour applies. It defaults to 127.
colorize has the following signature:
ImageOps.colorize(image, black, white, mid=None, blackpoint=0,
                  whitepoint=255, midpoint=127)  # returns a new image
imageis the original image.blackis the colour to use for black pixels.whiteis the colour to use for white pixels.midis the colour to use for mid-point pixels.blackpointis the value that should be mapped to theblackcolour.whitepointis the value that should be mapped to thewhitecolour.midpointis the value that should be mapped to themidcolour.
The mapping parameters must be in ascending order, that is:
blackpoint <= midpoint <= whitepoint
However, if mid is not used, the midpoint value is ignored.
grayscale
grayscale accepts an RGB image and converts it to a greyscale image (similar to a black and white photograph). Here is how the original carousel image looks after conversion:

Here is the code:
im = Image.open('carousel-small.jpg')
im = ImageOps.grayscale(im)
im.save('carousel-small-grey.jpg')
grayscale doesn't take any additional parameters.
invert
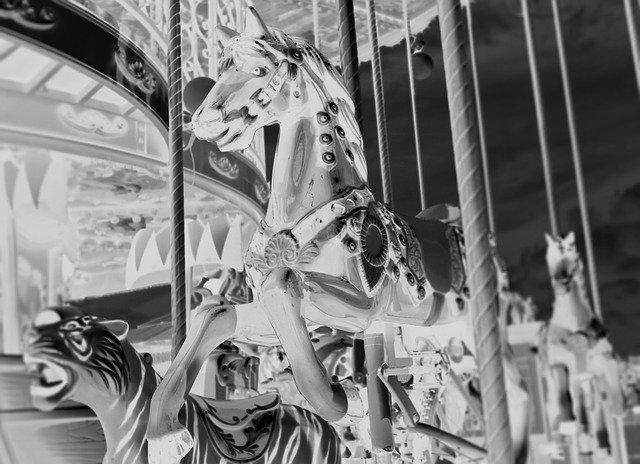
invert inverts all the colour values in an image, creating something that looks like a photographic negative.
Here is the result for a greyscale image. Dark values become light, and light values become dark:
Here is the result for a colour image:
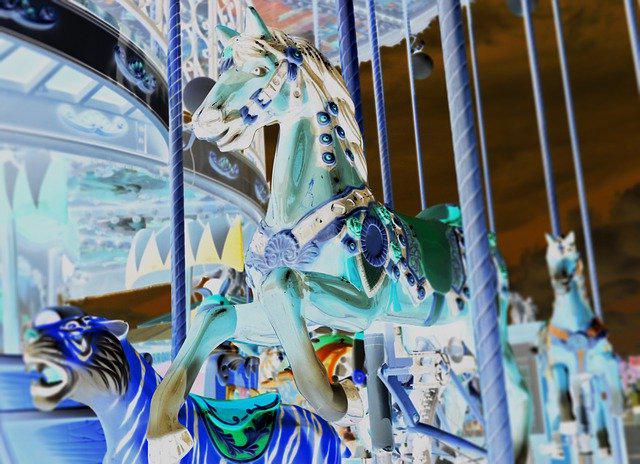
In the colour image, the red, green and blue channels are inverted individually. This mean that each colour is reflected across the colour wheel (for example, red colours become cyan, etc), as well as dark and light being inverted.
Here is the code:
im = Image.open('carousel-small.jpg')
im = ImageOps.invert(im)
im.save('imageops-invert.jpg')
invert doesn't take any additional parameters.
posterize
Posterization is a process where the number of colours in an image is significantly reduced. This causes areas of the image that have similar colours to be replaced by areas of a single flat colour. This gives an effect similar to old fashioned posters, where the printing technique used only allowed for a limited number of flat colours.
Here is an example:
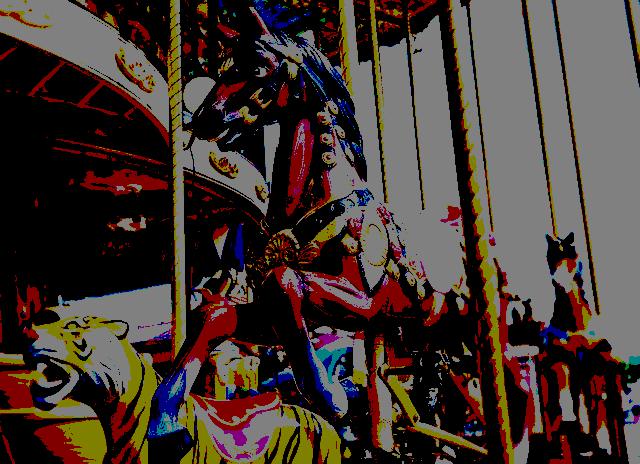
The posterize function gives a fairly crude effect. It reduces the number of bits used for each colour. We normally use 8 bits per colour, which gives 256 different levels of each colour, which means we don't really see any quantisation effects. If we reduce the number of bits to 4, then each colour has only 16 possible levels, so in a gradually changing colour we see distinct bands where the colour looks the same.
The image above only uses 1 bit per colour per pixel, which means that there are only 8 different colours in the image (red, green and blue can each be either fully on or fully off).
Here is the code:
im = Image.open('carousel-small.jpg')
im = ImageOps.posterize(im, 1)
im.save('imageops-posterize-1.jpg')
posterize has the following signature:
ImageOps.posterize(image, bits) # returns a new image
imageis the original image.bitsthe number of bits per colour to use, integer from 1 to 8.
solarize
Solarizing is an effect which inverts the brightest parts of the image.
Here is an example:
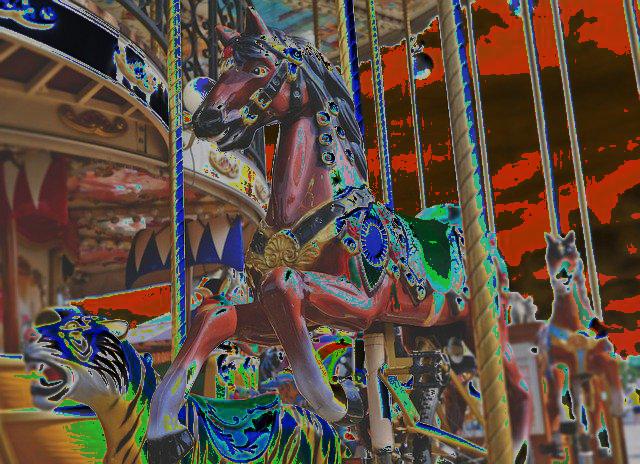
Solarize works by calculating the grey level of each pixel. If the grey level for a partuclary pixel is greater that a threshold (set to 192 in the example) that pixel is inverted. Otherwise it is left unchanged.
Looking at the image, you can see that the sky, and the reflective highlights of the carousel, are inverted, but the rest of the carousel is unchanged. This gives a surreal effect.
Here is the code to solarize an image:
im = Image.open('carousel.jpg')
im = ImageOps.solarize(im, 192)
im.save('imageops-solarize.jpg')
solarize has the following signature:
ImageOps.solarize(image, threshold=128) # returns a new image
imageis the original image.thresholdthe grey value threshold. All pixels that are lighter than this are inverted.
Related articles
Join the GraphicMaths/PythonInformer Newsletter
Sign up using this form to receive an email when new content is added to the graphpicmaths or pythoninformer websites:

Popular tags
2d arrays abstract data type and angle animation arc array arrays bar chart bar style behavioural pattern bezier curve built-in function callable object chain circle classes close closure cmyk colour combinations comparison operator context context manager conversion count creational pattern data science data types decorator design pattern device space dictionary drawing duck typing efficiency ellipse else encryption enumerate fill filter for loop formula function function composition function plot functools game development generativepy tutorial generator geometry gif global variable greyscale higher order function hsl html image image processing imagesurface immutable object in operator index inner function input installing integer iter iterable iterator itertools join l system lambda function latex len lerp line line plot line style linear gradient linspace list list comprehension logical operator lru_cache magic method mandelbrot mandelbrot set map marker style matplotlib monad mutability named parameter numeric python numpy object open operator optimisation optional parameter or pandas path pattern permutations pie chart pil pillow polygon pong positional parameter print product programming paradigms programming techniques pure function python standard library range recipes rectangle recursion regular polygon repeat rgb rotation roundrect scaling scatter plot scipy sector segment sequence setup shape singleton slicing sound spirograph sprite square str stream string stroke structural pattern symmetric encryption template tex text tinkerbell fractal transform translation transparency triangle truthy value tuple turtle unpacking user space vectorisation webserver website while loop zip zip_longest
